

Your WordPress site menu is not created automatically, but must be generated specifically. To do this, go to Appearance > menu
Here a screen will open, where, if it doesn’t already exist, you will have to create a new menu, and then add the buttons and links you want to see on your site.
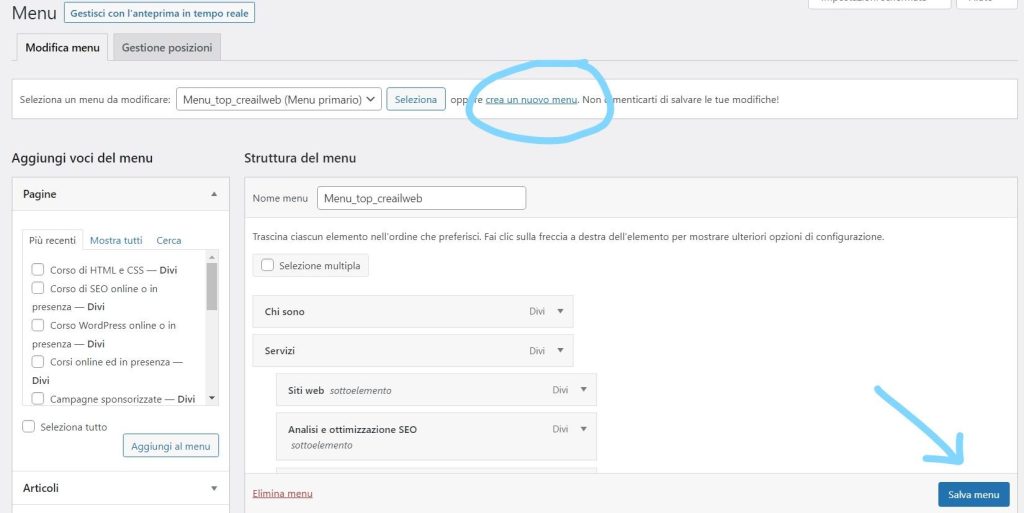
In the screen you see above, there is already a site menu, but in the top line I have highlighted the “Create new menu” button. Then you will always need to save with the “Save menu” button.
In fact, in WordPress it is possible to create different menus, depending on our needs.
For example, if the theme we have installed requires that there is a menu at the top and a menu in the footer (at the bottom), we can create these two menus and have them displayed in the desired areas.
Or it may be that we need to create a menu in WordPress to insert it somewhere in the site as a Widget, then we will create it and then insert it where we want.
Once the menu has been created we need to insert the menu items that we want to appear, choosing from the options that WordPress offers us in the left column:
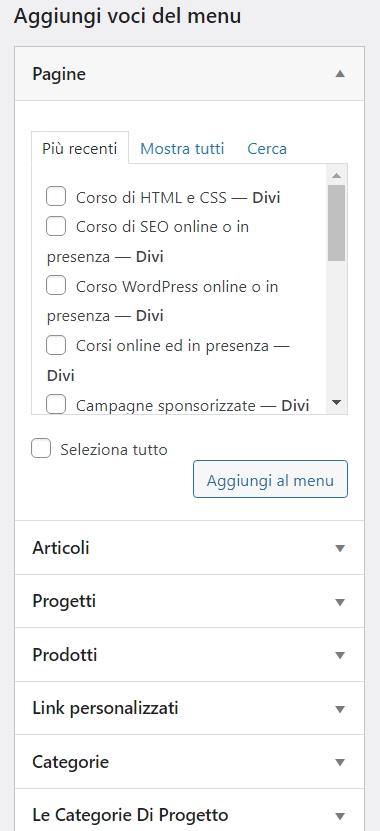
WordPress offers us the possibility of inserting into the Menu the Pages that we have already created, or the Articles that we have already created, or Article Categories, Products, if we have Woocommerce installed, and various entries depending on how our site is structured.
It also offers us the possibility of inserting “Custom Links”, where we will manually insert a URL and a customized menu item.
The steps to follow are these:
- put a check mark next to the menu items you want to insert
- press the “add to menu” button
- Save your menu again with the “save menu” button at the bottom right
Ordering menu items
At this point you will see the menu structure on the right side of the screen and you can order the various items according to the display order you want.
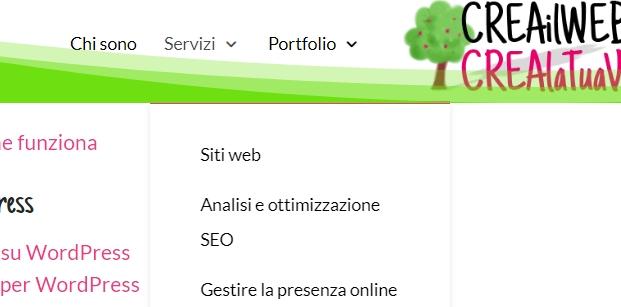
You can drag each menu item one above or below the other and also create drop-down menus, inserting items “indented” with respect to the main item:

As you can see in the image above, the “Websites” item and the following ones appear moved a little to the right with respect to the “Services” item: this means that they will be submenus of the “Services” item, i.e. drop-down menus:
Show the WordPress menu at the top of your site
Once we have inserted and ordered all the menu items that we want to show on our site, we need to tell WordPress WHERE to insert the menu, choosing one of the available options always at the bottom in the same wayscreenshot:
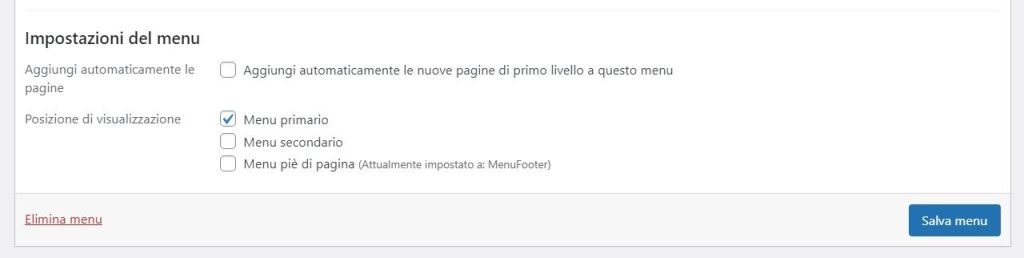
The available options vary depending on the WordPress theme installed. Typically the “Primary Menu” or “Main Menu” option is always there, because almost all sites need to have a menu. Then check the box next to that item, and then Save once more.
Customizing Menu Items
Each menu item can be customized, meaning you can change the text that will appear in the site’s menu. to do this you have to expand the menu item by pressing the black arrow next to the menu item text:

As you can see you can change the text, choose to open the link in a new window, manually move the item up and down, or delete it.
Always remember to save your changes to see them active on your website.
I hope I was clear and complete in the explanation, if you have any questions write them in the comments.
