

During the second year of training for Cultural Heritage Restoration Technician at Engim Restauro in Vicenza, we tackled the canvas restoration module together with the restorer teacher Alessandra Sella.
A module that was interesting and engaging for me, given my interest in the restoration of painted canvases.
The restoration method
The restoration method that we implemented is the one introduced by Prof. Winfried Heiber, which deals with the repair of tears and gaps on the canvas by reuniting warp and weft thread to warp thread, to restore continuity to the textile support in the least invasive way possible, to restore the structure of the canvas and its movements to homogeneity.
With this method, clean cuts, tears, scuffs and holes with loss of the textile support can be repaired and is part of the conservative phase of the restoration operation of a canvas.
Before proceeding with the repair of a painted canvas, it is necessary to proceed with the safety of the artefact, for example through a total or partial vellum coating.
We then evaluate how to restore the support, the wooden frame, whether to redo it or restore the existing one.
If there are losses of pictorial film and color losses, proceed with a consolidation from the back of the canvas.
If there is a previous lining, proceed to remove it, after which proceed to repair the tears, holes and lacerations.
We then try to avoid a subsequent re-lining, creating self-supporting repairs, that is, adding to the canvas repair a structure of crossed threads according to the direction of the warp and weft that better supports the repair itself.
The thread-to-thread compensation technique consists of rejoining all the warp and weft threads, joining the two heads with a dot of glue.
If pieces of some thread are missing, extensions are made, with the same thread as the canvas, always gluing the heads of the threads together.
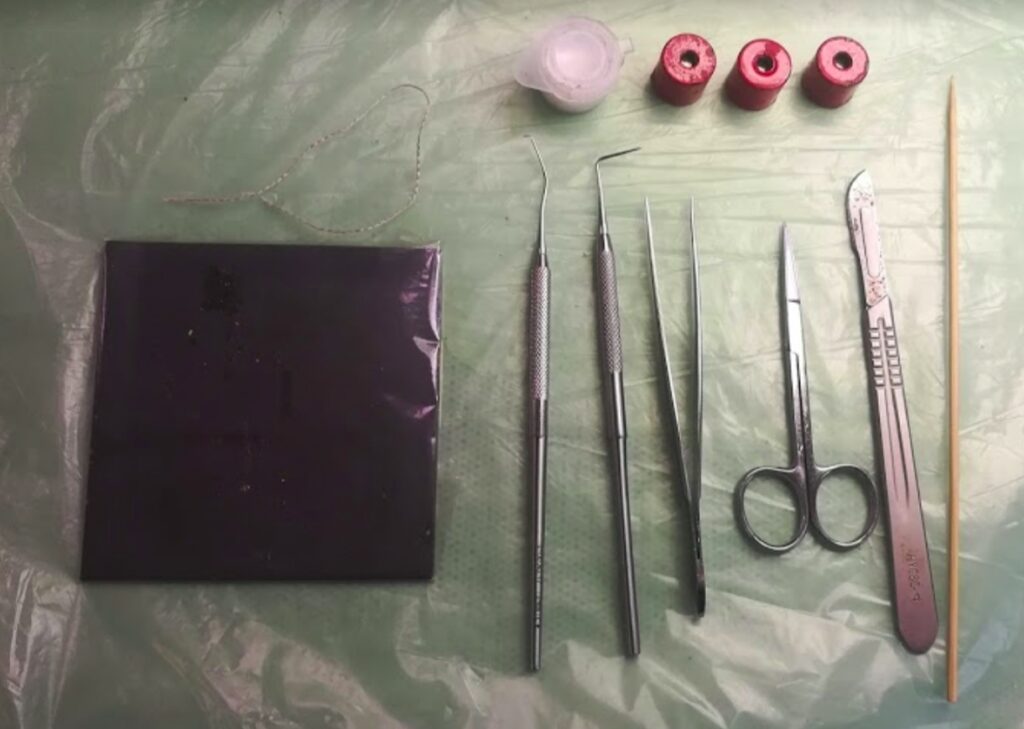
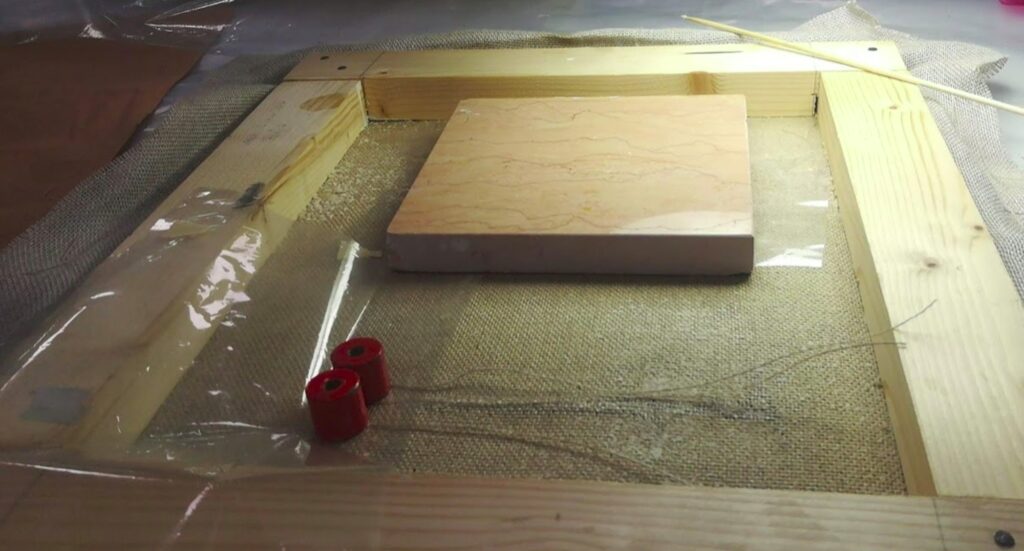
The tools used for the operation are:
- specilli (like those used by dentists)
- scissors
- scalpels
- tweezers
- melinex sheets
- round magnets and a metal panel
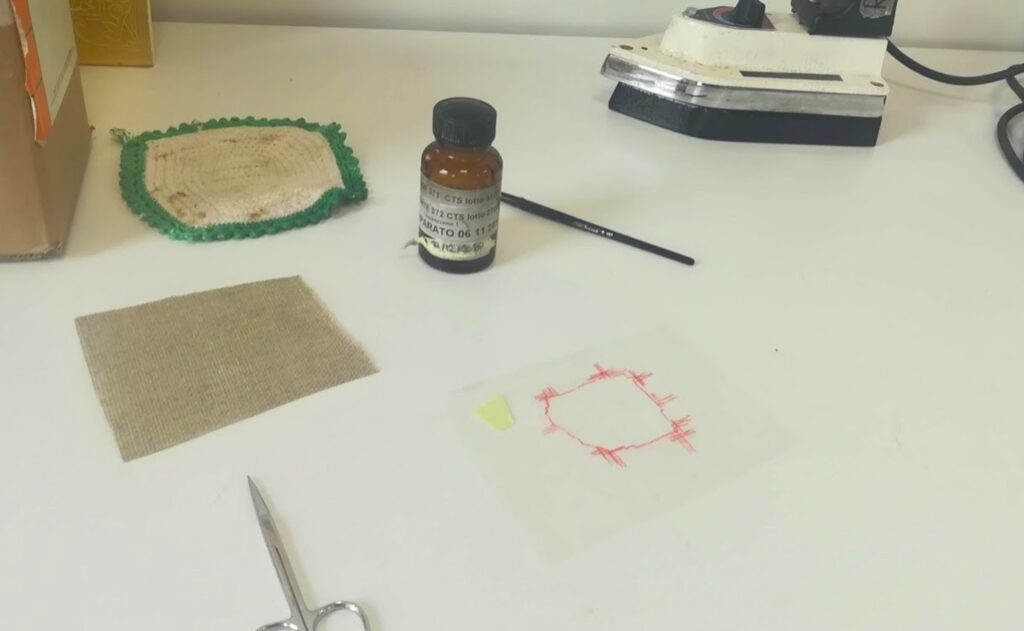
- Eva-art glue, an aqueous dispersion of ethylene vinyl acetate resin (EVA)
- pointed wooden stick
- to repair a hole, you can also use Beva 371 glue, a synthetic hot glue dissolved in solvent for Beva 372 in a 1:1 ratio
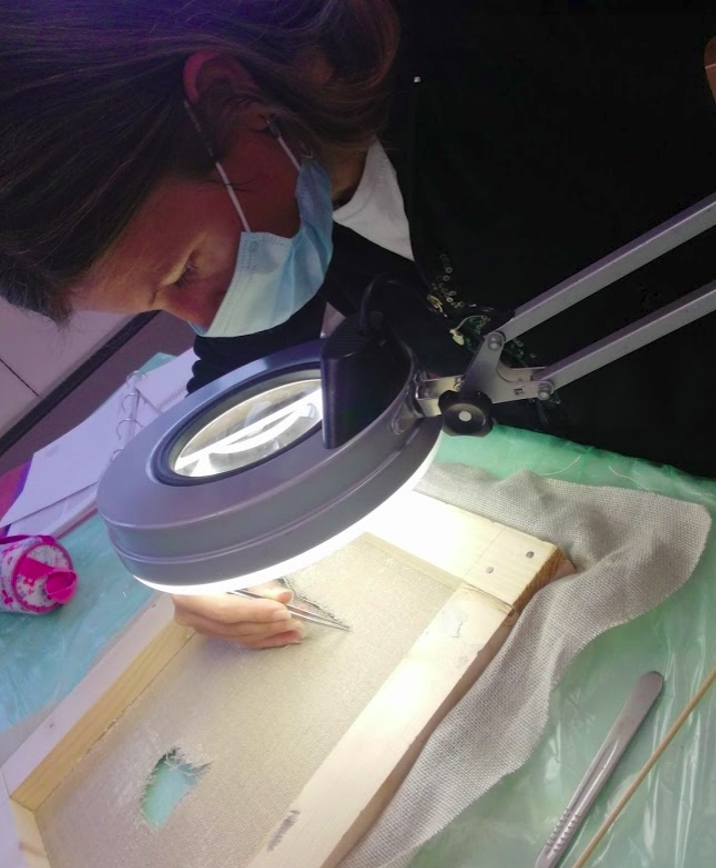
I tried both a torn and a hole, of a linen canvas prepared with chalk and glue, with a weft and warp of canvas weave.

Work under a lens and with good light.
Risarcitura dello strappapo
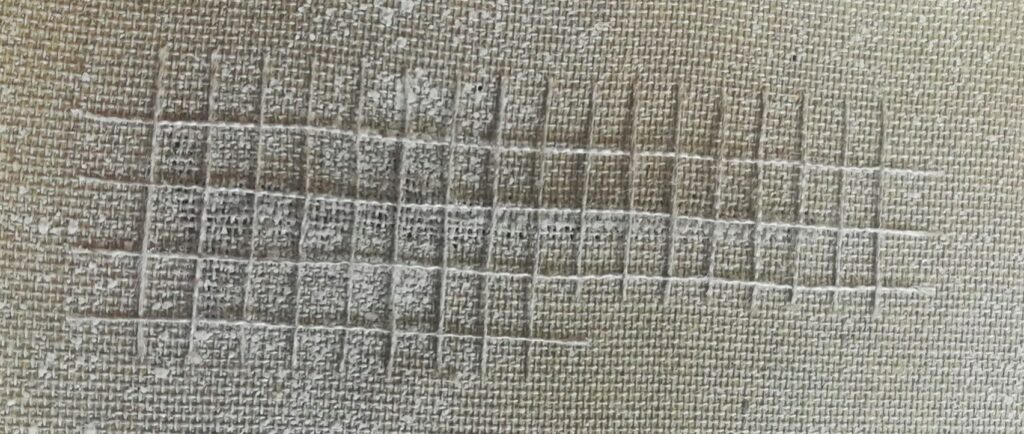
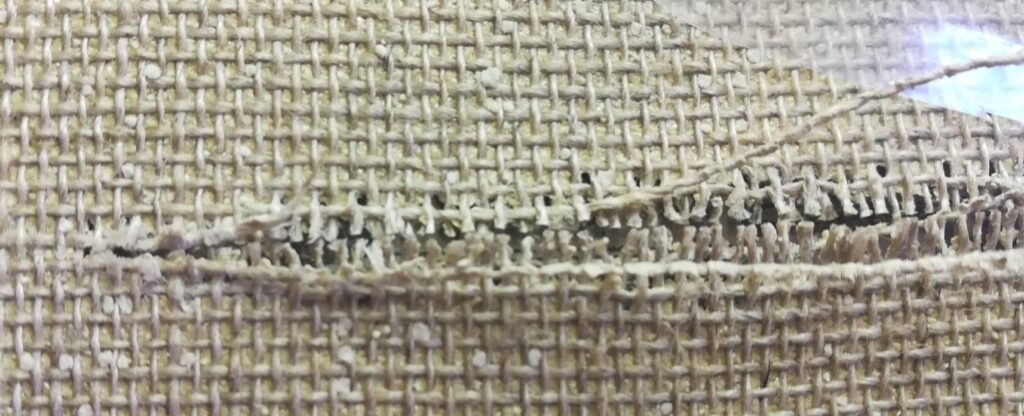
First I got to work on the tear, and the first thing to do is to realign all the weft and warp threads so as to ricblock the original weave well, reweaving the remaining pieces of thread by passing them upside down.
If the canvas has waves, you can moisten it slightly and leave a uniform weight underneath so that the edges of the tear match up again.
My tear was long and ended with a T, so I put the threads back in place as much as possible and rearranged the edges so as to bring the heads closer together.

You can work on multiple fronts at the same time, waiting for the heads to glue together, I worked alternately on the sides of the T, where the threads were frayed but I was able to reconstruct the warp and weft with the original threads, and then I moved on to the long side where the threads were very short and the heads barely touched.
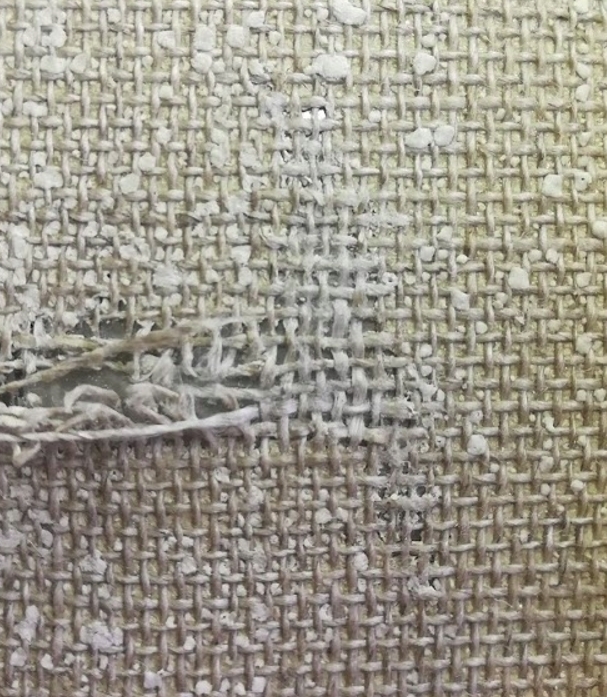
The side of the T was quite “simple“ to repair, I found I had more problems on the longer side, where I had very short threads that had to meet and very long threads that had to pass over and under. I also had partially broken wires, so I had to figure out how to organize myself with the extensions.
However, I noticed that as you continue to bring the wires closer together and glue them together, some sections that seemed “impossible“ also become resolvable even without extensions.
I found some difficulties when the wires were soaked in preparation that appeared
in lumps, when the wires were particularly frayed and it was not possible to rejoin them perfectly because the heads were very “scattered“ and it was not easy to reroll them as originally.
I tried, on the long side, to reunite the heads as much as possible by slightly wetting the wire and trying to “pull” it with the tweezers, but by wetting I obtained the result of fraying the heads that were then very large.
For most of the short wires I opted to make extensions, because they remained open by 2-3 millimeters and the heads did not touch, and right in the 2-3 millimeter gap the other perpendicular wire had to pass above and below.
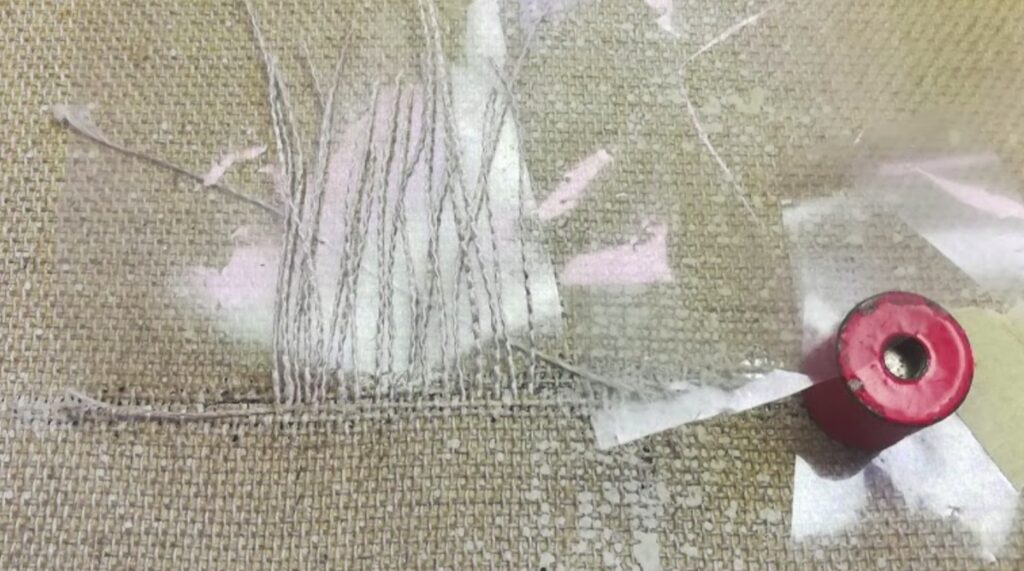
I had to make a considerable amount of extensions and I proceeded as follows:
on the lower side of the tear I created alternating extensions, so that they all had to pass “under“ the perpendicular wire.

Once all the extensions were in place, I placed the perpendicular wire on top and then made the necessary extensions on the other side, which at that point were much less because the heads matched better thanks to the realignment of the nearby wires.
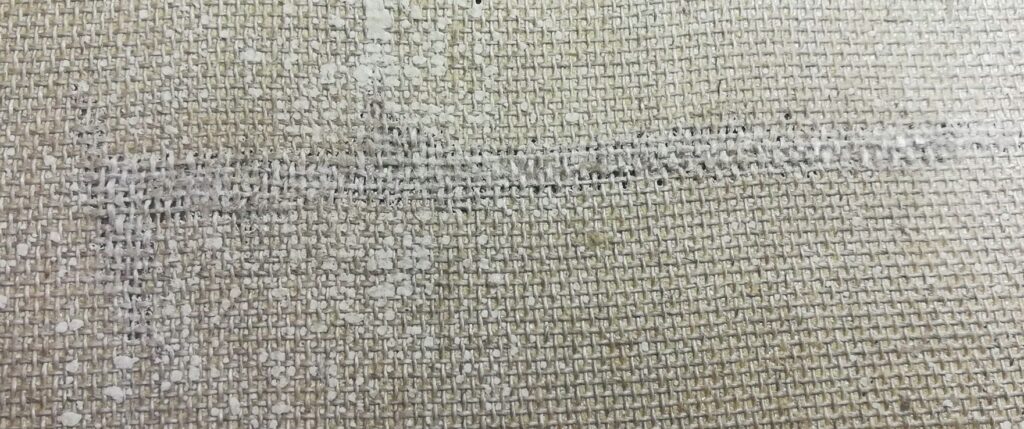
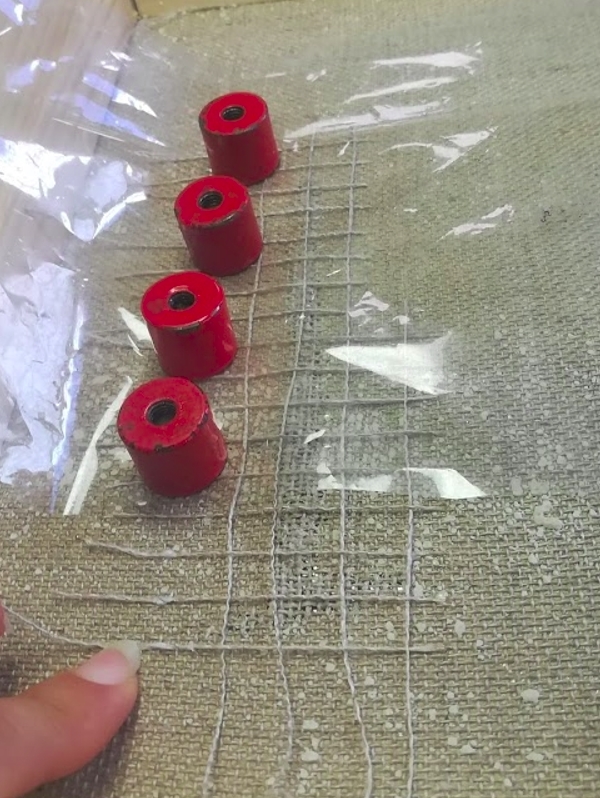
Oncehaving completed the repair of the tear with great satisfaction, I created the self-supporting structure by crossing additional threads in the direction of the warp and weft, fixing them at the ends and with a dot of glue also at the intersections.
Repair of the hole
If I thought that repairing the tear was difficult, that of the hole was worse.
In this case, you would have to make the extensions thread by thread to rejoin the warp and weft, but it is preferable to create an inlay perfectly respecting the shape and dimensions of the hole, of the same cloth that we have to repair, or thinner, always joining the heads of the threads.
First, realign the threads as much as possible, returning them to their original position and joining all the threads that can be joined. We also try to flatten the sides of the hole by moistening it a little and putting a weight on top of the canvas, because otherwise if there are “bellies” it is more difficult to create a perfect inlay.

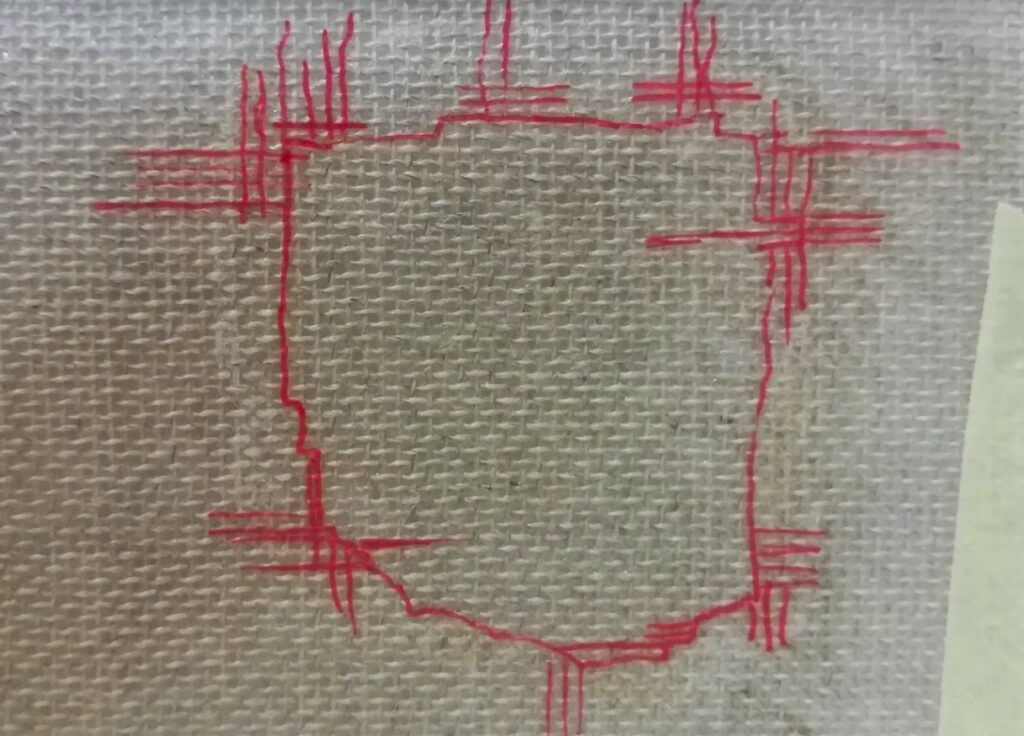
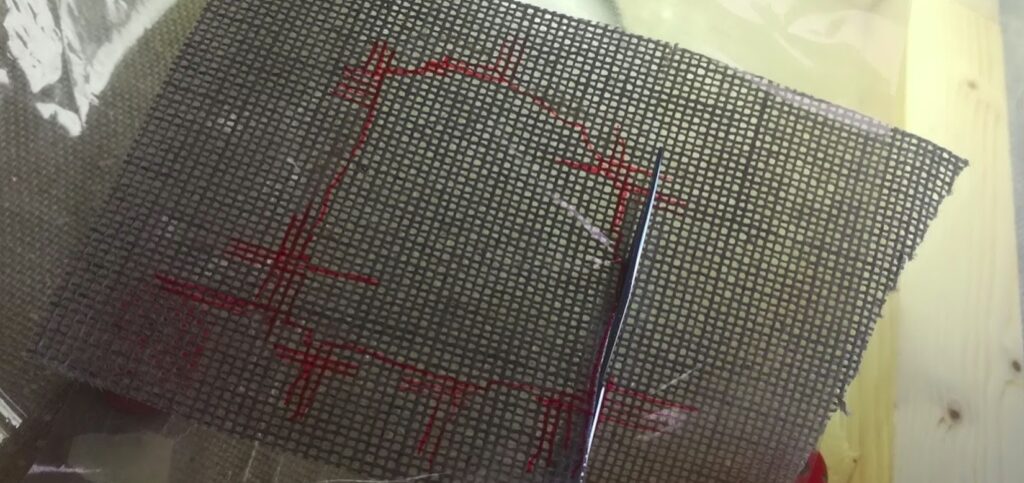
Then proceed by drawing the outline of the hole on the melinex with a marker, also drawing some threads on the reference edge that will be used to align the design to be cut out in the piece of canvas to be added to ours.
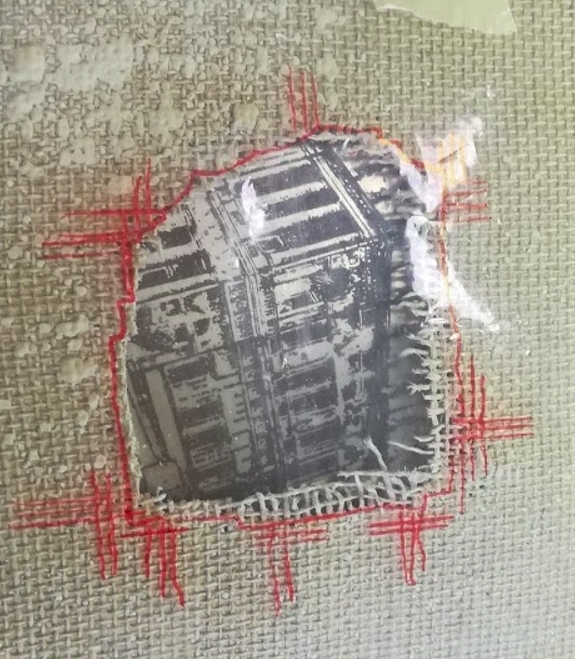
The inlay design must be done perfectly on the edge of our hole, taking into account the threads we have, maybe a little outside because it is always better to have more than less, because then you can always take away, but not add.
We heat the Beva in a bain-marie, and with a small brush we pass the external edge of our drawing with the Beva. When the Beva becomes opaque, we can place it on the new canvas where we need to obtain the inlay, and with an iron we glue it to the new canvas.
The drawing must be aligned with the warp and weft threads of the new canvas with the references we have drawn.
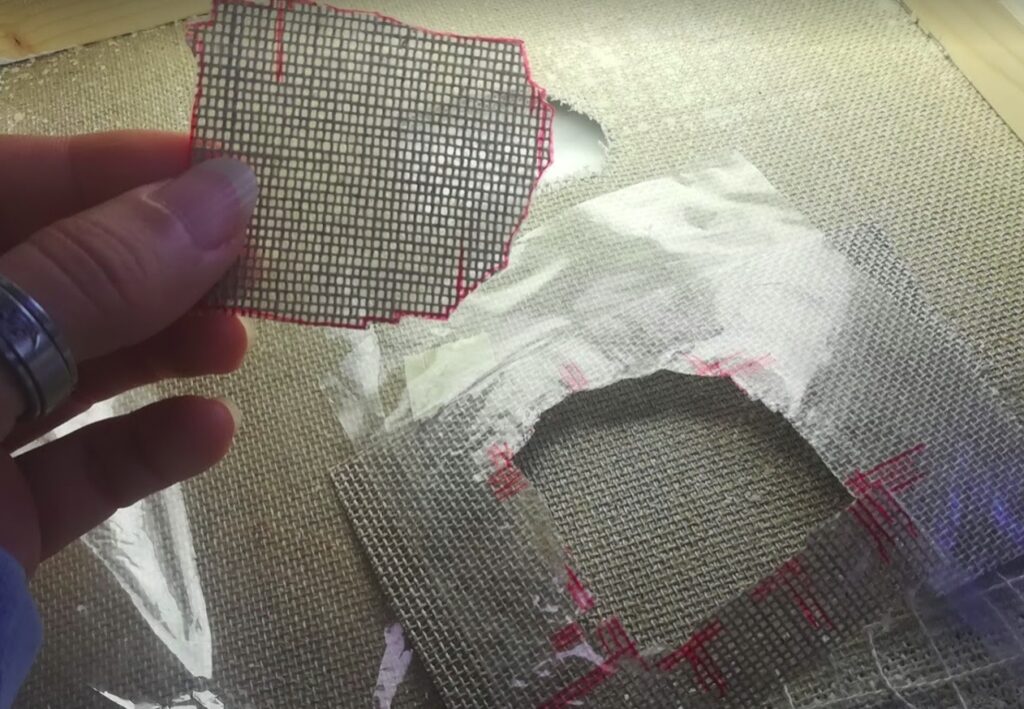
With the scissors we then cut out the shape of the inlay.
I cut out the inlay twice, because I then realized that the first one had the warp and weft inclined obliquely in a different way than my canvas to be repaired, for which I would have found
bad after having to “stretch“ the threads in one direction and the other.
The canvas chosen to make the new inlay will be chosen respecting the type of canvas of the original, the type of weave and as similar as possible to the aging of the original canvas. The canvas used must have already been stressed and glued.
So I got to work, and at this stage I was quite discouraged because the inlay seemed huge to me, I couldn’t figure out how I would correctly rejoin the threads above and below that never seemed to match, and I kept counting the threads on the various sides of the inlay to make them match on all sides before starting to glue.
But with the teacher’s advice I then understood that it was necessary to start from one side and then proceed little by little, in fact by joining the heads little by little, the wires began to match.
As I glued from one side I “stretched” the threads on the other side and found their arrangement, then proceeded towards closing the hole.
On the “under” side of the hole, which seemed so big to me, I proceeded gradually removing the threads that I didn’t need from the inlay, using the original long threads placed on top of the inlay where they were longer and cutting the extra ones only from the inlay.
In the end I could see that the inlay wasn’t actually too big, but I had calculated to cover the broken threads and so I found myself right with all the threads.
It was a job of great patience but also of great satisfaction because you realize that where you think it is impossible to reconstruct the warp and weft, little by little you can do it, seeing that the structure recreates itself without almost showing discontinuity.
